Building a minimal shower
 Dominik
 The idea behind our shower is simple. What is the minimal amount of space that you need in order to comfortably get clean in a van? There are many different answers to this problem. We chose to build a waist high shower box that serves as storage for dirty laundry and as an extension of our kitchen countertop when the shower is not in use, which is... 99% of the time. We feel like this way we don't waste any space for the little amount of time that we actually spend showering.
Disclosure: Some links may be affiliate links and if you go through them to make a purchase we will earn a commission – at no extra cost to you.
Our shower box is 70cm wide, 60cm deep and about 70cm tall. We raised the bottom of the shower box about 20cm in order to make room for water pipes, wires and air pipes, so that the top of our shower box aligns with the rest of the kitchen countertop, which sits at about 90cm. The raised bottom also helps in getting in and out of the shower, because you don't need to raise your leg that high. The box is slightly wider than it is deep in order to take into accocunt the curved walls of the van. You may need to adjust these measurements to your situation.
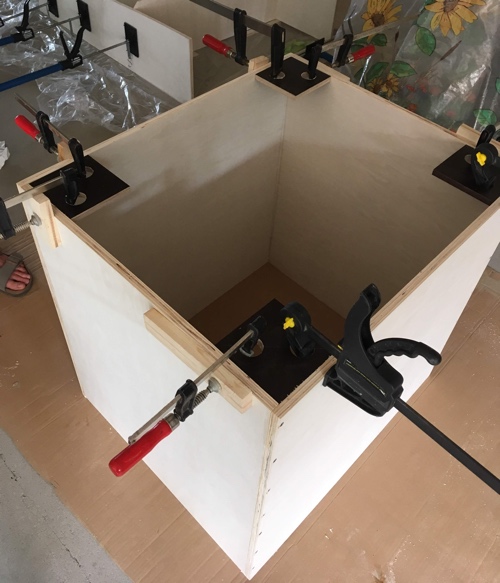
The first step was to cut the bottom and side pieces out of 15mm lightweight plywood to the desired dimensions. We then routered grooves into the plywood for the magnets (Amazon.com | Amazon.de) that will ensure that the shower curtain does not cling to your body when the hot steam of the shower rises to the top. After that, we assembled the basic box with screws and wood glue using clamps and custom made 90 degree helpers.
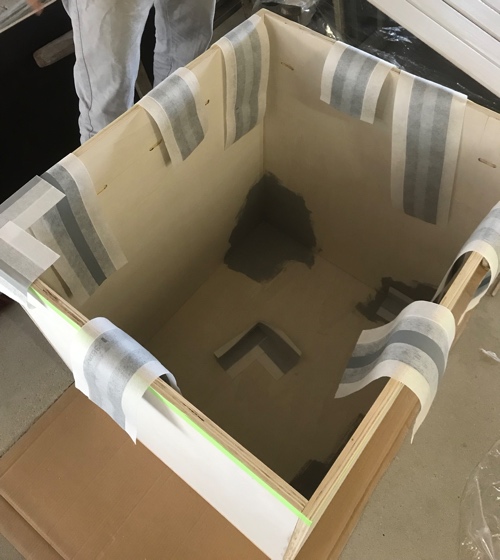
The next step was to make the box as water tight as possible by applying some sort of primer and multiple layers of a liquid waterproofing membrane. For the edges, we used the additional reinforcements that came with our waterproofing kit (Amazon.com | Amazon.de).
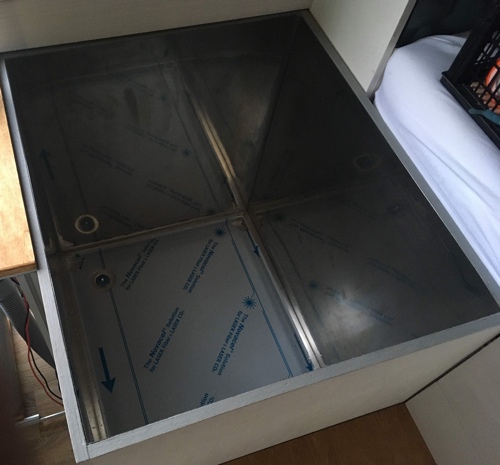
After that we ordered a custom size shower tub that comes with a drainage outlet and siphon. This piece of hardware is built according to your dimensions and preferences. Make sure to measure accurately, as you want it to fit inside the box without any gaps. Alternatively, you can order this first and build your box around this, which should make it a little easier.

After that we inserted the magnets into the grooves that we had previously routered and then we glued four 1.5mm stainless steel sheets to the inner walls of the box using a polyurethane industrial adhesive (Amazon.com | Amazon.de). Finally, we siliconed all the edges in order to prevent any water from leaking. If any water manages to find its way through the cracks, the liquid waterproofing membrane will prevent it from penetrating into the wood.
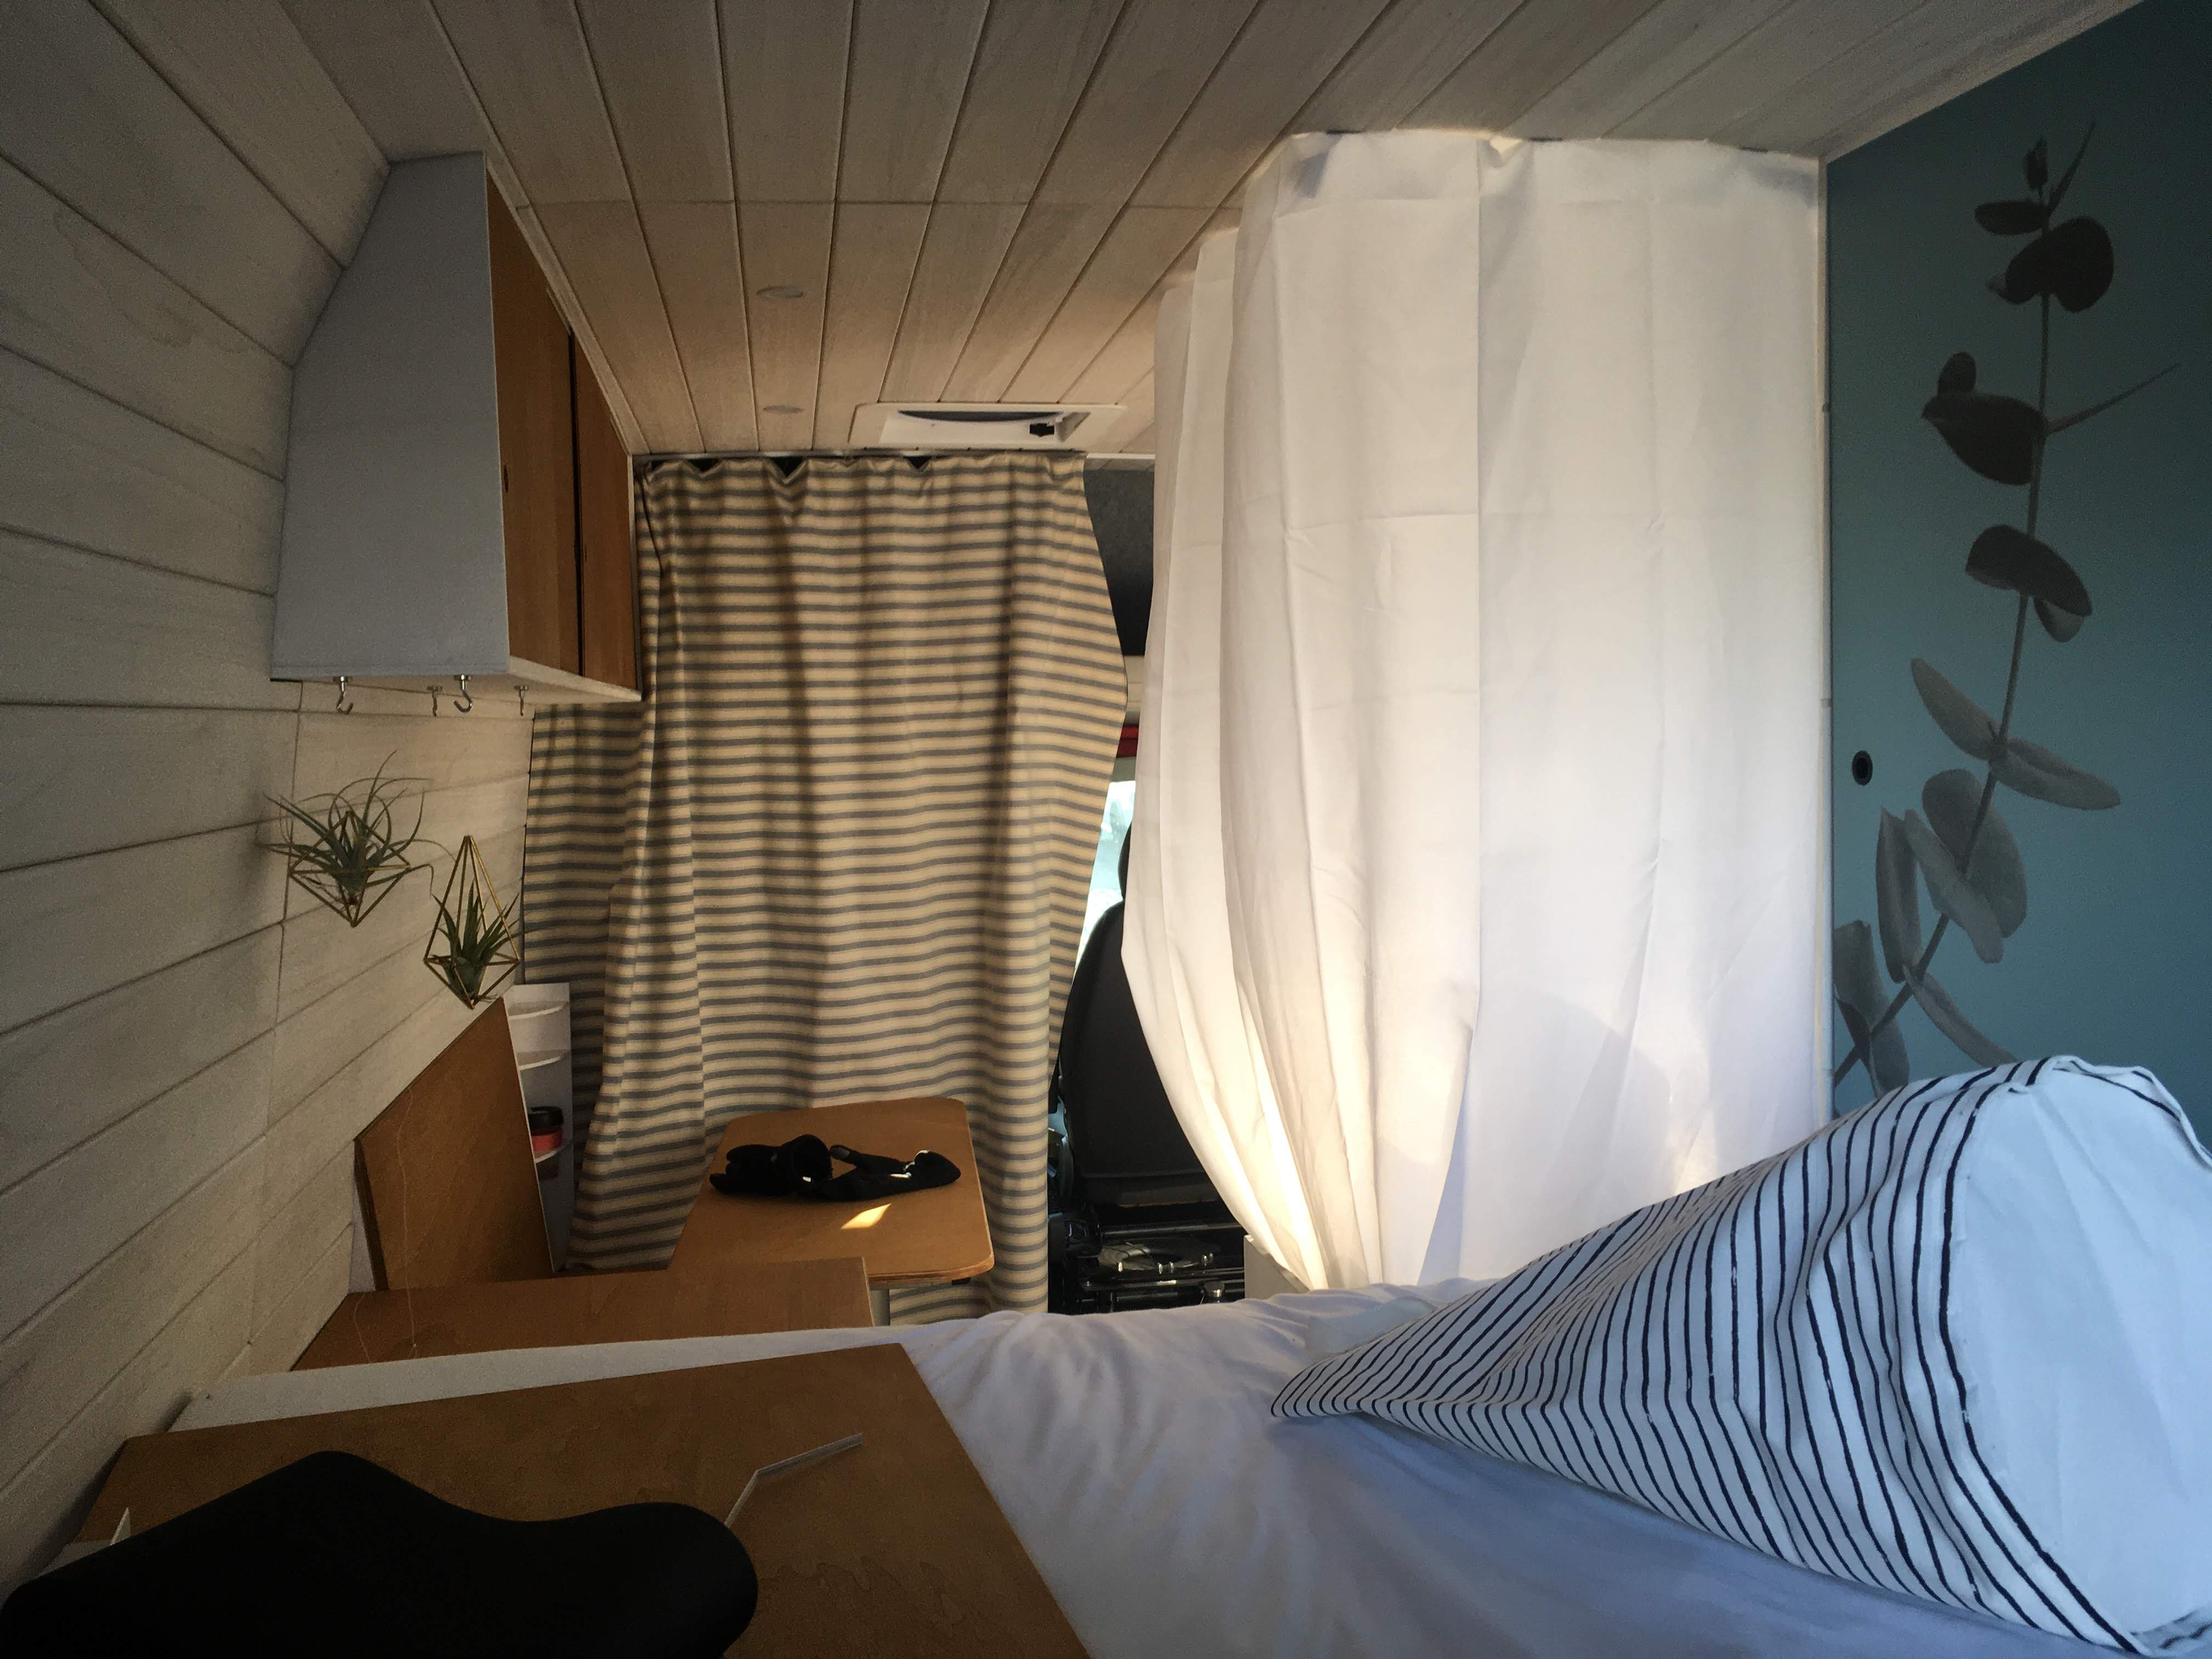
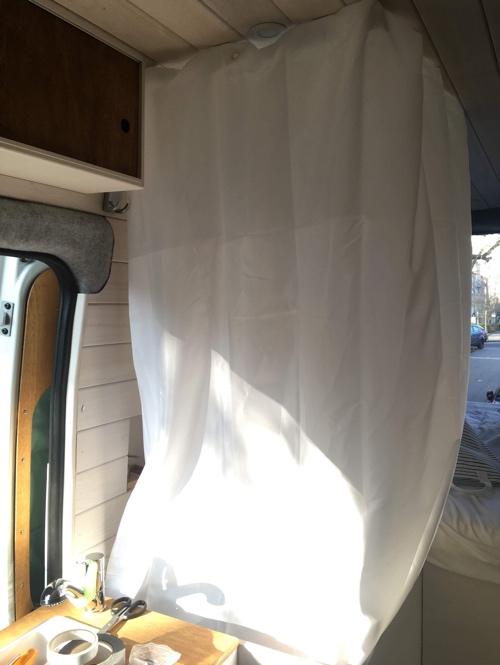
Finally, the shower curtain was modified to include some magnets in the correct positions (matching the magnets in the shower box and in the wood ceiling) and it was also shortened so that it only covers the necessary parts. All in all, we used roughly 50 magnets in the ceiling, the shower box and the curtain.
There you have it, a minimal DIY shower that is easy to build and gets out of your way when you don't need it.